Dealing with a laptop stuck on mute can be incredibly frustrating, especially when you’re trying to watch a video, join a meeting, or listen to music.
A laptop stuck on mute can result from driver or firmware issues. If using multiple monitors, display flickering may indicate bandwidth stress. Updating audio drivers and adjusting display settings can help resolve sound and flickering problems.
In this guide, we’ll walk you through practical solutions to help you unmute your laptop and get your sound back on track. Let’s dive in!
Understanding the Problem: Why is Your Laptop Stuck on Mute?
Before diving into the solutions, it’s essential to understand why your laptop might be stuck on mute. The issue can stem from various factors, including software glitches, hardware malfunctions, incorrect settings, or outdated drivers. Here are some common reasons why your laptop might be stuck on mute:
- Volume Settings: The most straightforward explanation is that the volume is muted or set too low in the system settings.
- Keyboard Shortcuts: Accidentally pressing a mute key or a combination of keys could have muted the sound.
- Audio Drivers: Outdated or corrupted audio drivers can cause sound-related issues, including the laptop being stuck on mute.
- Operating System Glitches: Sometimes, the operating system itself may have bugs or glitches affecting audio functionality.
- Hardware Issues: Faulty speakers, audio jacks, or internal hardware components could be the culprit.
- Third-Party Applications: Certain applications or software might interfere with the audio settings, causing the laptop to mute itself.
- BIOS Settings: In rare cases, the BIOS settings might have configurations that affect the audio output.
Now that we’ve identified the potential causes let’s explore the step-by-step solutions to fix the issue.
Step 1: Check the Volume Settings

The first and most obvious step is to check the volume settings on your laptop. Here’s how you can do it:
1. Windows:
- Click on the speaker icon in the bottom-right corner of the taskbar.
- Ensure the volume slider is not set to the lowest level or muted.
- If the speaker icon has a red cross or a mute symbol, click on it to unmute the sound.
2. Mac:
- Click on the volume icon in the top-right corner of the menu bar.
- Adjust the volume slider to increase the sound level.
- Ensure that the mute option is not checked.
If the volume settings appear correct, but you’re still not hearing any sound, proceed to the next step.
Step 2: Check Keyboard Shortcuts
Many laptops come with dedicated mute keys or function keys that can quickly mute or unmute the sound. Accidentally pressing these keys could be why your laptop is stuck on mute. Here’s what you can do:
- Locate the Mute Key: Look for a key with a speaker icon or a mute symbol on your keyboard. It’s usually one of the function keys (F1-F12) or a dedicated key near the top of the keyboard.
- Press the Mute Key: Press the mute key once to see if it unmutes the sound. On some laptops, you may need to hold the “Fn” key while pressing the mute key.
- Check the Function Lock: Some laptops have a function lock (Fn Lock) that changes the behavior of the function keys. If the Fn Lock is enabled, the function keys might not work as expected. Try toggling the Fn Lock to see if it resolves the issue.
If the keyboard shortcuts don’t solve the problem, move on to the next step.
Step 3: Update or Reinstall Audio Drivers
Outdated or corrupted audio drivers commonly cause sound-related issues on laptops. Updating or reinstalling the audio drivers can often resolve the problem. Here’s how you can do it:
1. Windows:
- Right-click on the Start menu and select “Device Manager.”
- Expand the “Sound, video, and game controllers” section.
- Right-click on your audio device (e.g., Realtek High Definition Audio) and select “Update driver.”
- Choose “Search automatically for updated driver software” and follow the on-screen instructions.
- If updating the driver doesn’t work, you can try uninstalling the driver by right-clicking on the audio device and selecting “Uninstall device.” Then, restart your laptop, and Windows will automatically reinstall the driver.
2. Mac:
- Click on the Apple menu and select “System Preferences.”
- Go to “Software Update” and check for any available updates.
- If an update is available, install it and restart your Mac.
- If the issue persists, you can reset the NVRAM (non-volatile random-access memory) by shutting down your Mac, turning it on, and immediately pressing and holding the Option, Command, P, and R keys for about 20 seconds. This will reset the audio settings to default.
If updating or reinstalling the audio drivers doesn’t resolve the issue, proceed to the next step.
Step 4: Check for Operating System Updates
Sometimes, the problem might be caused by a bug or glitch in the operating system. Ensuring that your operating system is current can help resolve such issues. Here’s how you can check for updates:
1. Windows:
- Click on the Start menu and go to “Settings.”
- Select “Update & Security” and click “Check for updates.”
- If any updates are available, download and install them.
- Restart your laptop after the updates are installed.
2. Mac:
- Click on the Apple menu and select “System Preferences.”
- Go to “Software Update” and check for any available updates.
- If an update is available, install it and restart your Mac.
If updating the operating system doesn’t fix the issue, move on to the next step.
Step 5: Check for Third-Party Applications

Certain third-party applications or software might interfere with the Audio settings on your laptop, causing it to get stuck on mute. Here’s how you can identify and resolve such conflicts:
1. Check Recently Installed Applications:
If you recently installed any new software or applications, try uninstalling them to see if it resolves the issue.
2. Disable Startup Programs:
Some applications start automatically when you boot up your laptop and interfere with the audio settings. You can disable startup programs to see if it helps:
- Windows: Press Ctrl + Shift + Esc to open the Task Manager, go to the “Startup” tab, and disable any unnecessary programs.
- Mac: Go to “System Preferences,” select “Users & Groups,” click on your username, and then go to the “Login Items” tab. Remove any unnecessary applications from the list.
3. Check Audio Enhancements:
Some audio enhancement software or drivers might cause conflicts. You can try disabling audio enhancements:
- Windows: Right-click on the speaker icon in the taskbar and select “Sounds.” Go to the “Playback” tab, select your audio device, and click “Properties.” Under the “Enhancements” tab, check the “Disable all enhancements” box and click “OK.”
- Mac: Go to “System Preferences,” select “Sound,” and go to the “Output” tab. Select your audio device and uncheck any enhancement options.
If disabling third-party applications doesn’t resolve the issue, proceed to the next step.
Step 6: Check the Audio Output Device
Sometimes, the laptop might send Audio to the wrong output device, such as a disconnected external speaker or headset. Here’s how you can check and change the audio output device:
1. Windows:
- Right-click on the speaker icon in the taskbar and select “Sounds.”
- Go to the “Playback” tab and check the list of audio devices.
- Ensure that the correct device (e.g., “Speakers” or “Headphones”) is set as the default device. If not, right-click on the correct device and select “Set as Default Device.”
- If you see any disconnected or unused devices, you can right-click on them and select “Disable” to prevent them from interfering.
2. Mac:
- Click on the Apple menu and select “System Preferences.”
- Go to “Sound” and select the “Output” tab.
- Ensure that the correct audio output device is selected. If you’re using built-in speakers, select “Internal Speakers.”
If the audio output device is set correctly, but you’re still not hearing any sound, move on to the next step.
Step 7: Check for Hardware Issues
The issue might be hardware-related if none of the software-related solutions have worked so far. Here’s how you can check for hardware problems:
- Check the Speakers: Test the speakers by connecting external speakers or headphones to your laptop. If you can hear sound through the external devices, the issue might be with the built-in speakers.
- Inspect the Audio Jack: If you’re using headphones or external speakers, check the Audio jack for any physical damage or debris that might obstruct the connection.
- Check the BIOS Settings: In rare cases, the BIOS settings might have configurations that affect the audio output. During the boot process, you can access the BIOS settings by restarting your laptop and pressing the appropriate key (usually F2, F10, or Del). Look for any audio-related settings and ensure they are enabled.
- Run Hardware Diagnostics: Some laptops come with built-in diagnostic tools to help identify hardware issues. Check your laptop’s user manual or the manufacturer’s website for instructions on how to run these diagnostics.
Suppose you suspect a hardware issue and cannot resolve it alone. In that case, it’s advisable to contact the laptop manufacturer’s support or take your laptop to a professional technician for further diagnosis and repair.
Step 8: Perform a System Restore or Reset
Suppose the issue started recently, and you suspect a recent system change might have caused it. In that case, you can try performing a system restore or reset to revert your laptop to a previous state where the Audio was working correctly.
1. Windows:
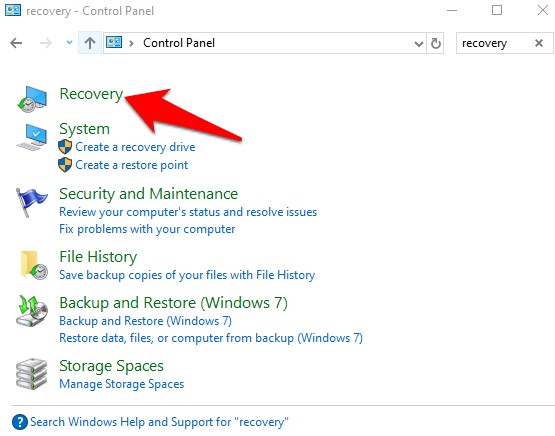
- Click on the Start menu and go to “Settings.”
- Select “Update & Security” and go to the “Recovery” tab.
- Under “Reset this PC,” click “Get started” and choose to keep your files or remove everything, depending on your preference.
- Follow the on-screen instructions to reset your laptop.
2. Mac:
- Click on the Apple menu and select “System Preferences.”
- Go to “Time Machine” and check for a recent backup.
- If you have a backup, you can restore your Mac to a previous state using Time Machine.
Performing a system restore or reset can help resolve software-related issues, but remember that it will also remove any recently installed applications or changes made to the system.
Step 9: Seek Professional Help
If you’ve tried all the above steps and your laptop is still stuck on mute, it might be time to seek professional help.
Contact the manufacturer’s customer support or take your laptop to an authorized service center. A professional technician can diagnose the issue more thoroughly and provide a solution.
Preventing Future Audio Issues
Once you’ve resolved the issue, it’s a good idea to take some preventive measures to avoid encountering similar problems. Here are some tips:
- Keep Your System Updated: Regularly update your operating system, drivers, and software to ensure you have the latest bug fixes and improvements.
- Avoid Installing Unnecessary Software: Be cautious about installing third-party applications or software that might interfere with your system settings.
- Use Surge Protectors: Protect your laptop from power surges using a surge protector, as power fluctuations can damage internal components, including the audio hardware.
- Handle Hardware with Care: Be gentle with your laptop’s hardware, especially the audio jack and speakers, to avoid physical damage.
- Regularly Clean Your Laptop: Dust and debris can accumulate inside your laptop and affect its performance. Regularly clean your laptop to prevent such issues.
Conclusion
If your laptop is stuck on mute, don’t panic! You can restore sound by checking volume settings, updating drivers, and troubleshooting hardware. Follow these steps to fix the issue and prevent future audio problems for a hassle-free experience.